The add receipt menu located on the Receipt sub-menu allows users to create and add receipts for billings after they have been issued. To do this, select Receipt from the main menu and then add receipt from the sub-menu. This will direct you to a page entitled New Receipts, where users will be able to enter the information needed to create the receipt. Alternatively, users can click on the create receipt icon located in the options column of the billings list. This will direct you to the new receipt page and automatically populate some of the fields so that a new receipt can be created without the need to manually select the client.
To create the Receipt:
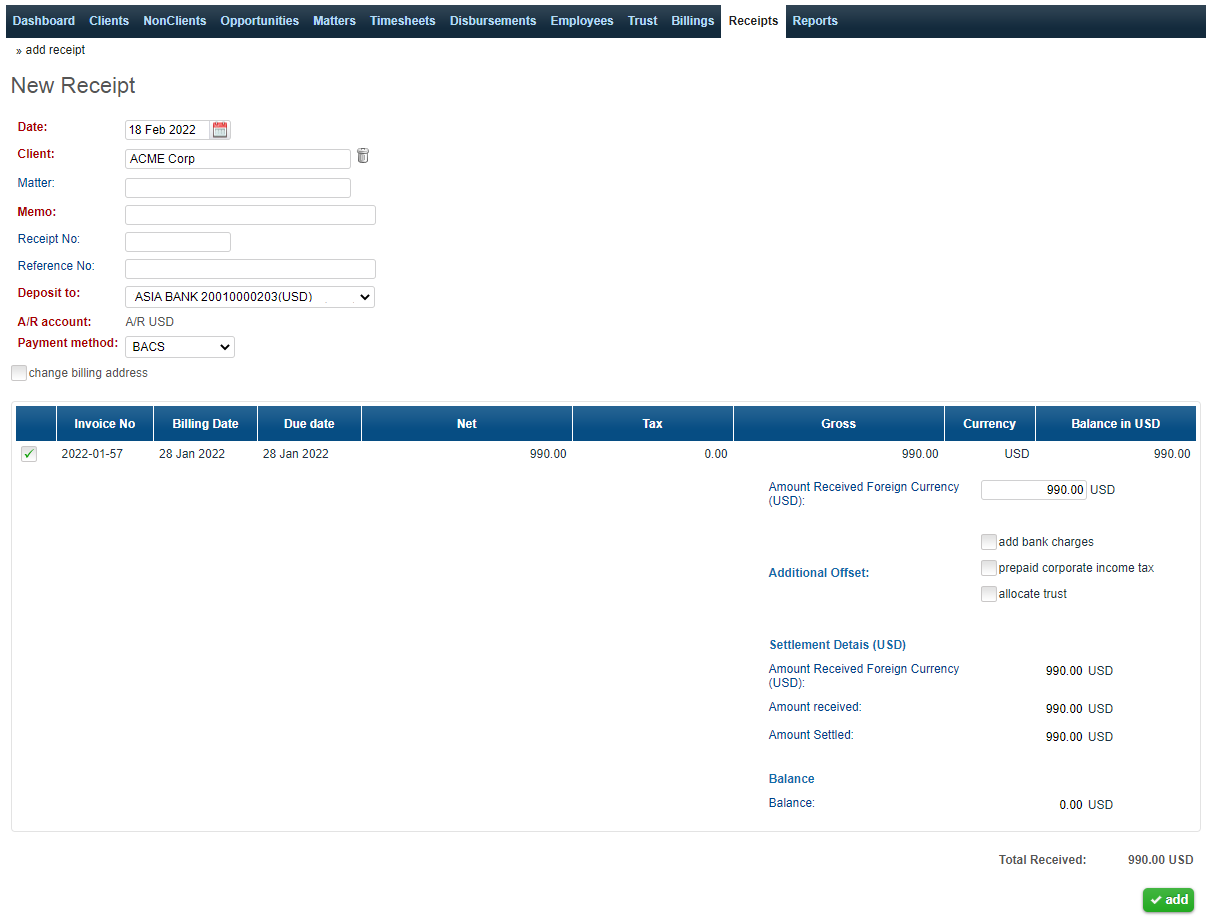
1. Enter the appropriate date.
2. Begin typing the name of the client into the Client filed. This will automatically search for matching entries, displaying a list of possible choices. Click on the appropriate choice to fill in the field. Once a selection has been made, any invoices that a receipt can be created for will appear in the lower half of the screen.
3. Enter the matter (if required).
4. Fill in the Memo and reference number (if required).
5.In the “deposit to” field, select the appropriate bank account from the drop-down menu. (This will automatically populate the blank field next to A/R account.)
6. Select the appropriate payment method from the list of choices in the drop-down menu.
Depending on your setup, you might be able to also defined receipt number, however for most companies receipt number is generated automatically.
For users that create a receipt from the billing tab, some fields on the New Receipts page will automatically populate with information that has been taken from fields in the bill that the receipt is being created for.
Once the above has been completed, the remaining steps involve selecting the invoices to create a receipt for. To select all the invoices in the list, tick the box ![]() in the upper left-hand corner of the invoice list. Alternatively, you can select the invoices individually by ticking the box associated with the invoice you would like to select. Once an invoice has been selected, the amount settled field will automatically be populated with an amount equal to the gross amount.
in the upper left-hand corner of the invoice list. Alternatively, you can select the invoices individually by ticking the box associated with the invoice you would like to select. Once an invoice has been selected, the amount settled field will automatically be populated with an amount equal to the gross amount.
Then depending on payment scenario, we might have partial payments, bank charges and other adjustments applied to receipt where needed.
If Trust module is enabled and client does have trust fund balance available, system will allow to offset outstanding invoice amount with trust funds.