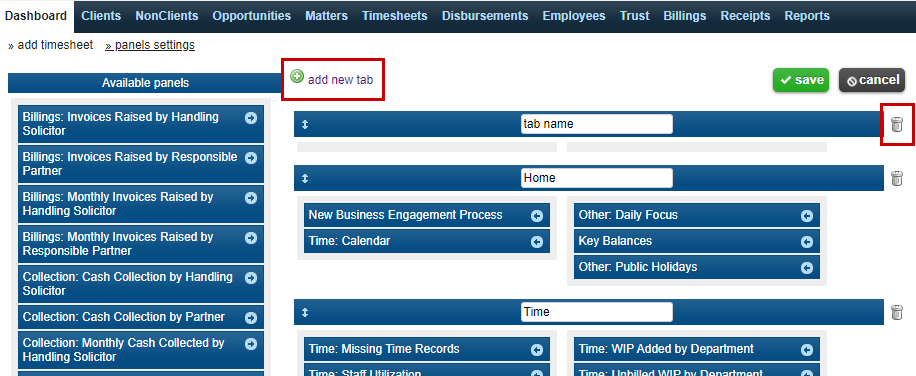
The add new tabs feature allows users to increase the number of tabs that appear on the dashboard. The button to add a new tab is located at the top of the panel settings page and has a green plus sign ![]() next to the words “add new tab.” Clicking on the words will add a blank tab at the end of your existing tabs list. Once a blank tab has been created the process of inputting data into the new tab is the same as if you were editing a tab that was previously in existence. Therefore, the following instructions apply to both creating new tabs and editing existing ones.
next to the words “add new tab.” Clicking on the words will add a blank tab at the end of your existing tabs list. Once a blank tab has been created the process of inputting data into the new tab is the same as if you were editing a tab that was previously in existence. Therefore, the following instructions apply to both creating new tabs and editing existing ones.
To edit the name of a tab, click in the field displaying the name and enter the text you would like to be displayed.
To add panels to a tab, select a panel from another tab or from the available panels list and drag it to the tab. If you would like to remove a panel from a tab either drag it to a different tab or place it in the available panels list.
To change the positioning of a tab along the dashboard, select the tab with your mouse and drag it to the position you would like.
To delete a tab, click the bin incon ![]() located on the right-hand side of the tab. Because panels cannot be deleted, deleting a tab with panels in it will automatically place the panels back into the available panels list.
located on the right-hand side of the tab. Because panels cannot be deleted, deleting a tab with panels in it will automatically place the panels back into the available panels list.