To create a new billing, select Billing from the menu and then add fee note from the sub-menu. This will direct you to a screen titled New Billing. On this screen, several fields will be displayed, with those in red indicating that they are a required field.
To Begin:
1. Start typing in the billing code or name of the client in the Client field. Typing in the name will bring up a list of potential matches. Choose the client from the list of matches.
2. You can enter billing to selected matter by entering the matter number or name in the next field.
3. In the third field you can select an billing attention (depending on your setup, it might be single or multiple contacts from the client record).
4. In some cases you might be able to define Billing number, however that is usually generated automatically by system and not displayed on the billing form.
3. Next is the Memo field which is your internal billing description that does not show on billing report sent to client.
4. Select the billing date.
5. Select any necessary options.
6. Select a matter(s) by ticking the tick box [X] next to the matter name.
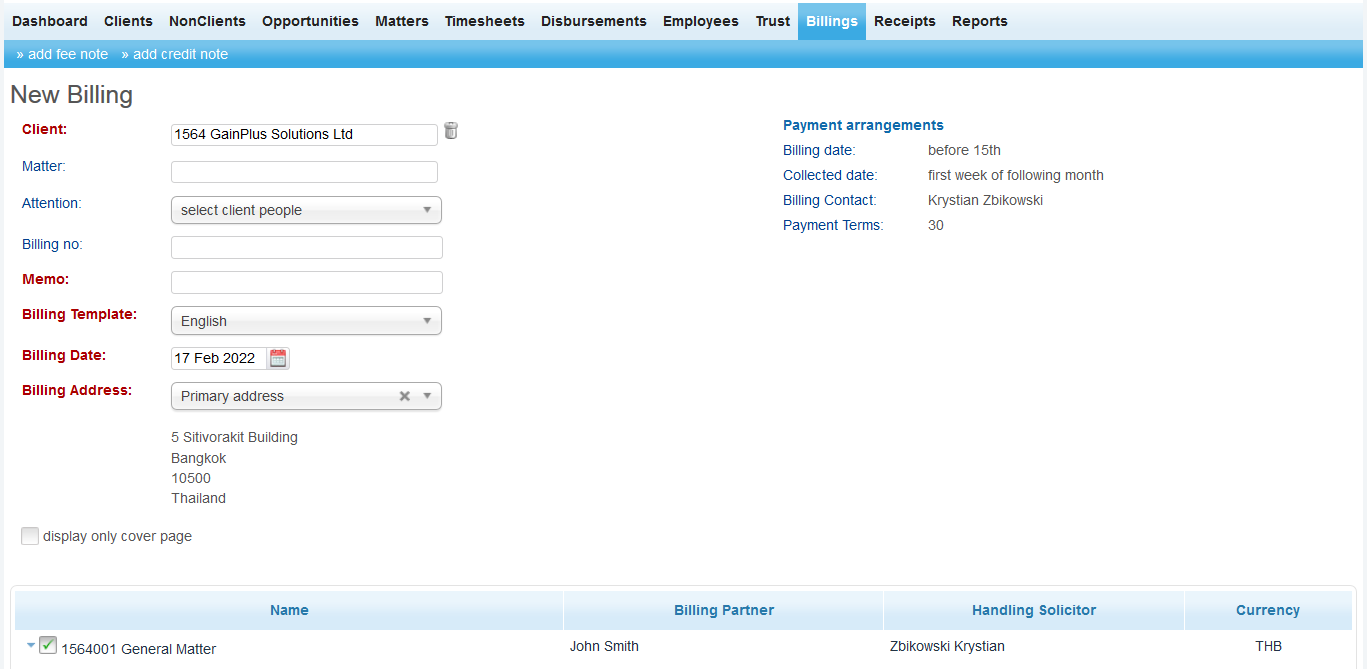
7. In the matter list, users can reveal matter details by selecting the drop-down ocpm from the left side of a matter name.
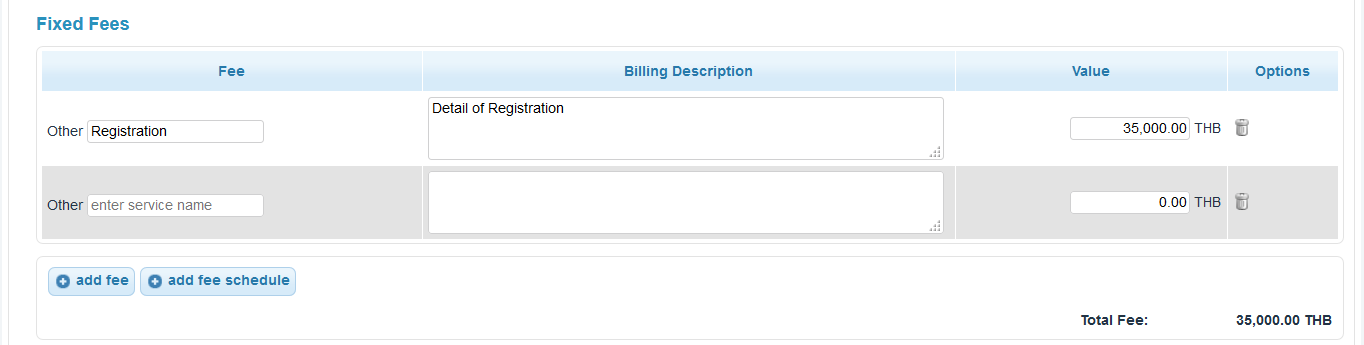
Once a matter has been selected, users have the ability to add fixed fees, select time sheets to bill, and also select disbursements.
FIXED FEES
With fixed fee, users have the ability to select either a pre-established fee from the drop down field or enter the name of a new fee. When a pre-established fee is selected, the value for the fee will automatically be populated. If you would like to change this, simply click within the field to change the value. If you are creating a new fee, the fee name, description, and value must all be entered manually.
If a fee schedule has been created for a specific matter, this can be added by selecting the add fee schedule button and choosing it from the drop-down menu.
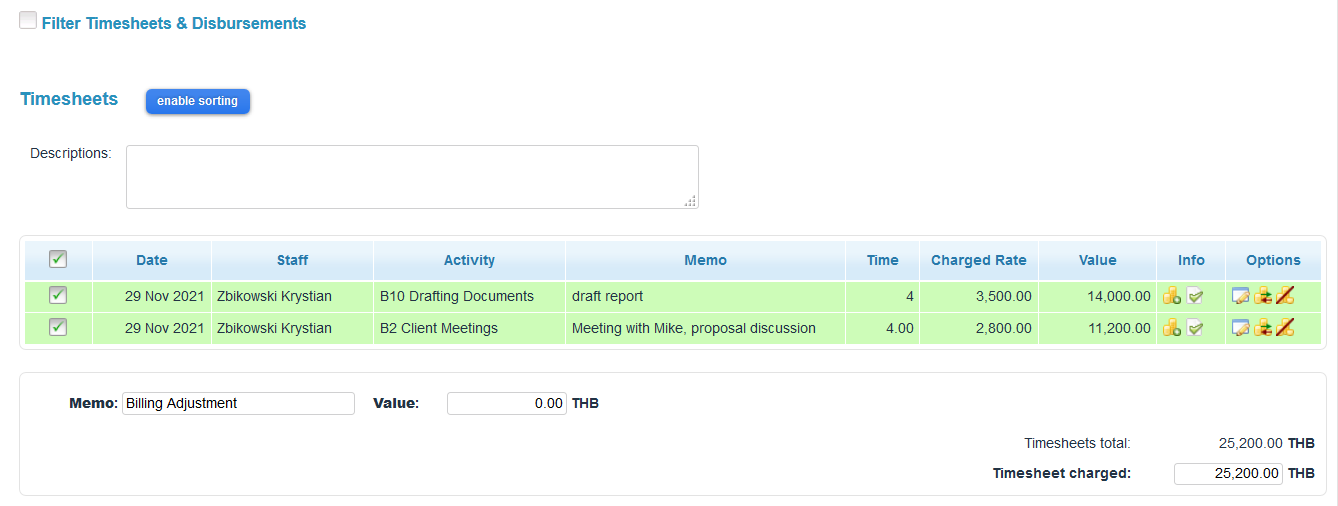
BILLING TIME
In the billing Timesheets section a listing of all the timesheets for a particular matter are displayed. To add a timesheet for billing, simply tick the box ![]() that corresponds to the timesheet. If you would like to add an additional charge to the bill, this can be done in the fields provided below the list of timesheets.
that corresponds to the timesheet. If you would like to add an additional charge to the bill, this can be done in the fields provided below the list of timesheets.
By default all timesheet records will be selected but you can decide which records you like to bill now and which should be left for processing later.
Under the OPTIONS column, we have ability to EDIT timesheet record, change between billable/non-billable and write it off to zero.
Depending on your setup, in this section you might also see description field. If available that field will be used for the billing report as a description of time billed.
Finally, in this section you may also billing Time in case where there are no timesheets added on matter. To do that enter description and value under Billing adjustment section (bottom left on below screen).
Note that using this function will create Timesheet with negative value record, which will then have to be balanced against incoming timesheets.
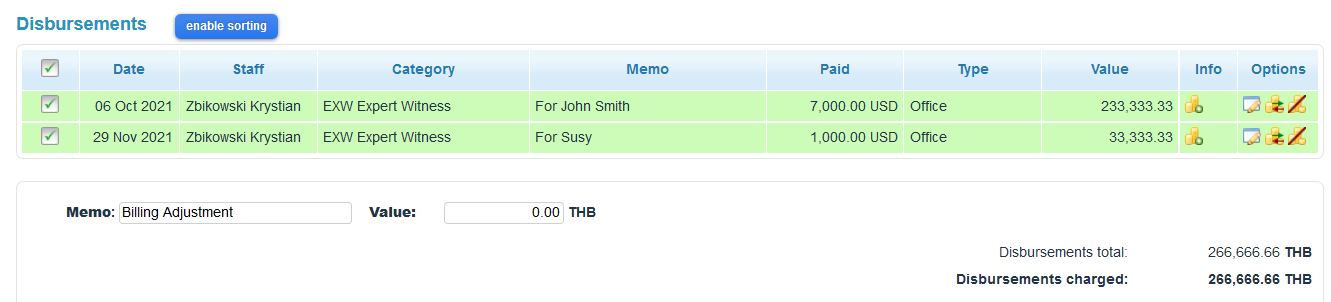
BILLING DISBURSEMENTS
Disbursements section provides a list of expenses for each matter. To add or remove a disbursement from the bill, tick the corresponding box accordingly.
Similar to timesheets, system provide ability to adjust expense or issue prepayment billing in case where expenses has not been accrued yet.
Finally, on the bottom of the billing page you will see billing summary with couple options like ability to change billing entity, partner, bank account, define VAT/WHT rates.
In case billing is prepared by PA or staff other then billing partner/manager, system provide ability to notify responsible parties.
From here you can create billing draft for Partners' approval or confirm billing report.

You can bill any of the above in combinations that you prefer. Note that depending on system configuration, not every company uses every component explain above or not every option is enabled.